

How To Set Up Outlook On Iphone Xs Max
Step 1 of 28
Touch Settings.
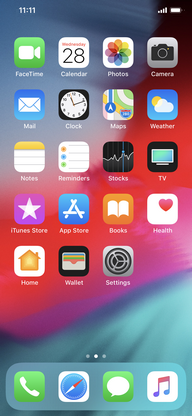
Images may not be exactly as shown.
Step 2 of 28
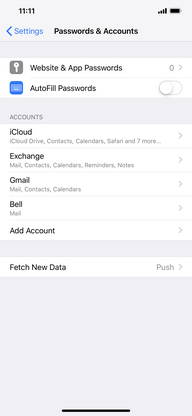
Scroll to and touch Passwords & Accounts.
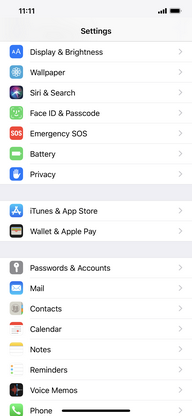
Images may not be exactly as shown.
Step 3 of 28
Touch Add Account.
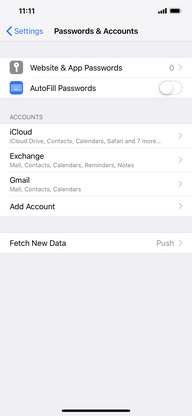
Images may not be exactly as shown.
Step 4 of 28
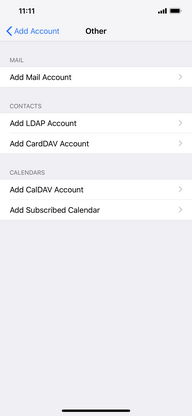
Touch Other.
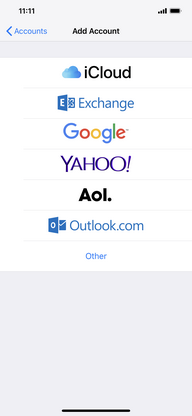
Images may not be exactly as shown.
Step 5 of 28
Touch Add Mail Account.
Images may not be exactly as shown.

Images may not be exactly as shown.
Step 7 of 28
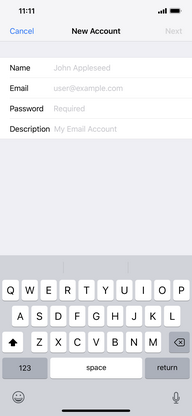
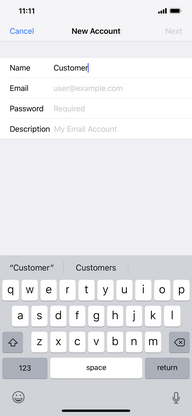
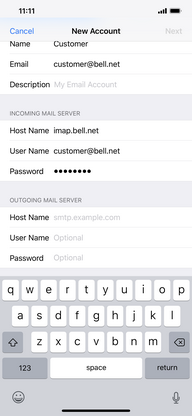
Enter your name.
Images may not be exactly as shown.
Step 8 of 28
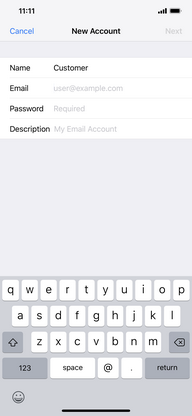
Touch Email.
Images may not be exactly as shown.
Step 9 of 28
Enter your Bell email address.
Images may not be exactly as shown.
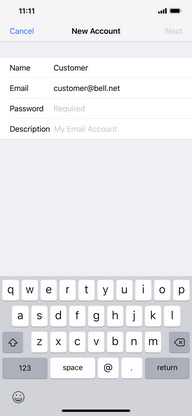
Step 10 of 28
Touch Password.
Images may not be exactly as shown.
Step 11 of 28
Enter your Bell email password.
Images may not be exactly as shown.
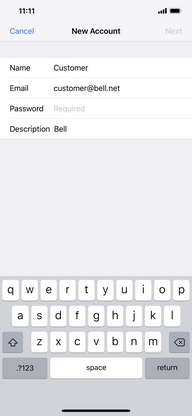
Step 12 of 28
Touch Next.

Images may not be exactly as shown.
Step 13 of 28
If the email account details are automatically recognized, the account will be added.
Otherwise, follow the steps below to set up the account manually.
Images may not be exactly as shown.
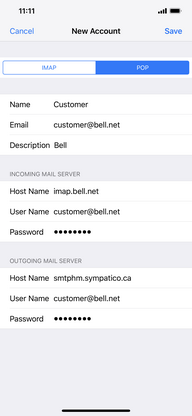
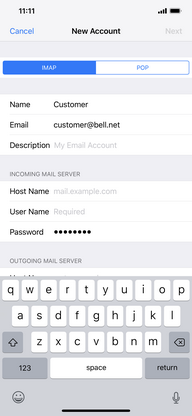
Step 14 of 28
Touch IMAP.
Images may not be exactly as shown.
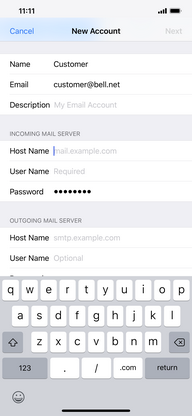
Step 15 of 28
Under INCOMING MAIL SERVER, touch Host Name.
Images may not be exactly as shown.
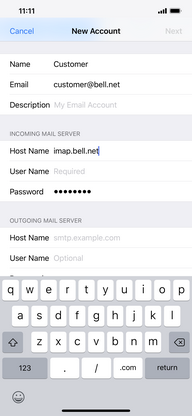
Step 16 of 28
Enter imap.bell.net as the incoming host name.
Images may not be exactly as shown.
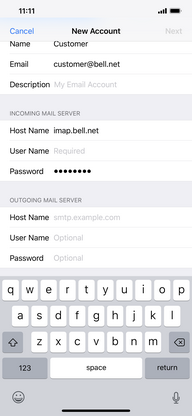
Step 17 of 28
Touch User Name.
Images may not be exactly as shown.
Step 18 of 28
Enter your Bell email address as the username.
Images may not be exactly as shown.
Step 19 of 28
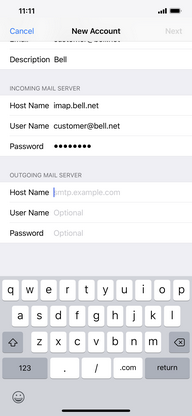
Under OUTGOING MAIL SERVER touch Host Name.
Images may not be exactly as shown.
Step 20 of 28
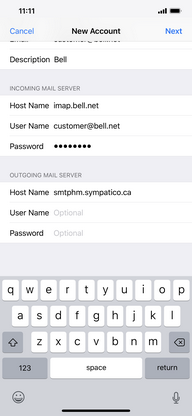
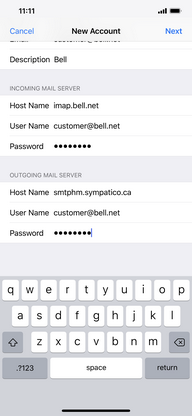
Enter smtphm.sympatico.ca as the outgoing host name.
Images may not be exactly as shown.
Step 21 of 28
Touch User Name.

Images may not be exactly as shown.
Step 22 of 28
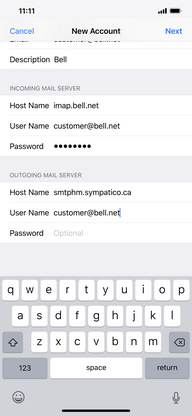
Enter your Bell email address as the username.
Images may not be exactly as shown.
Step 23 of 28
Touch Password.
Images may not be exactly as shown.
Step 24 of 28
Enter your Bell email password.

Images may not be exactly as shown.
Step 25 of 28
Touch Next.
Images may not be exactly as shown.
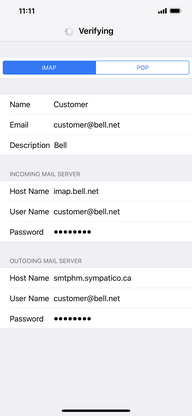
Step 26 of 28
Wait while the email settings are verified.
Images may not be exactly as shown.
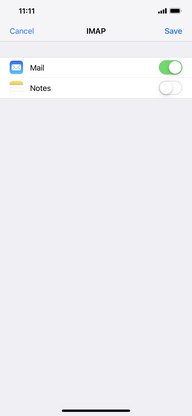
Step 27 of 28
Make sure email sync is turned on and touch Save.
Images may not be exactly as shown.
Step 28 of 28
Your email account has been added.

Images may not be exactly as shown.
Applicable to: iPhone 6 Plus, 6s, 6s plus, 7, 7 Plus, 8, 8 Plus, SE (2nd Gen), X, Xs, Xs Max, XR, 11, 11 Pro, 11 Pro Max, 12, 12 Pro, 12 Mini, 12 Pro Max, 13, 13 Pro, 13 Mini, 13 Pro Max.
How To Set Up Outlook On Iphone Xs Max
Source: https://support.bell.ca/mobility/smartphones_and_mobile_internet/apple-iphone.how_to_set_up_my_bell_email
Posted by: andersenliontion.blogspot.com
0 Response to "How To Set Up Outlook On Iphone Xs Max"
Post a Comment